Introduction
In this guide we will walk you through the steps required to build a network automation stack using the open-source tools Nornir, NAPALM and NetBox. Once we have built our stack we will then leverage it to perform the common use case of backing up device configuration.
Note: The accompanying code for this guide can be located at https://github.com/packetcoders/nornir-napalm-netbox-guide
 Rick Donato
Components
Our guide is based upon the integration of 3 open-source tools - Nornir, NAPALM and NetBox. Let’s look at each of the tools.
NetBox
NetBox is an:
open-source application built upon the Python Django framework, designed to help manage and document computer networks.
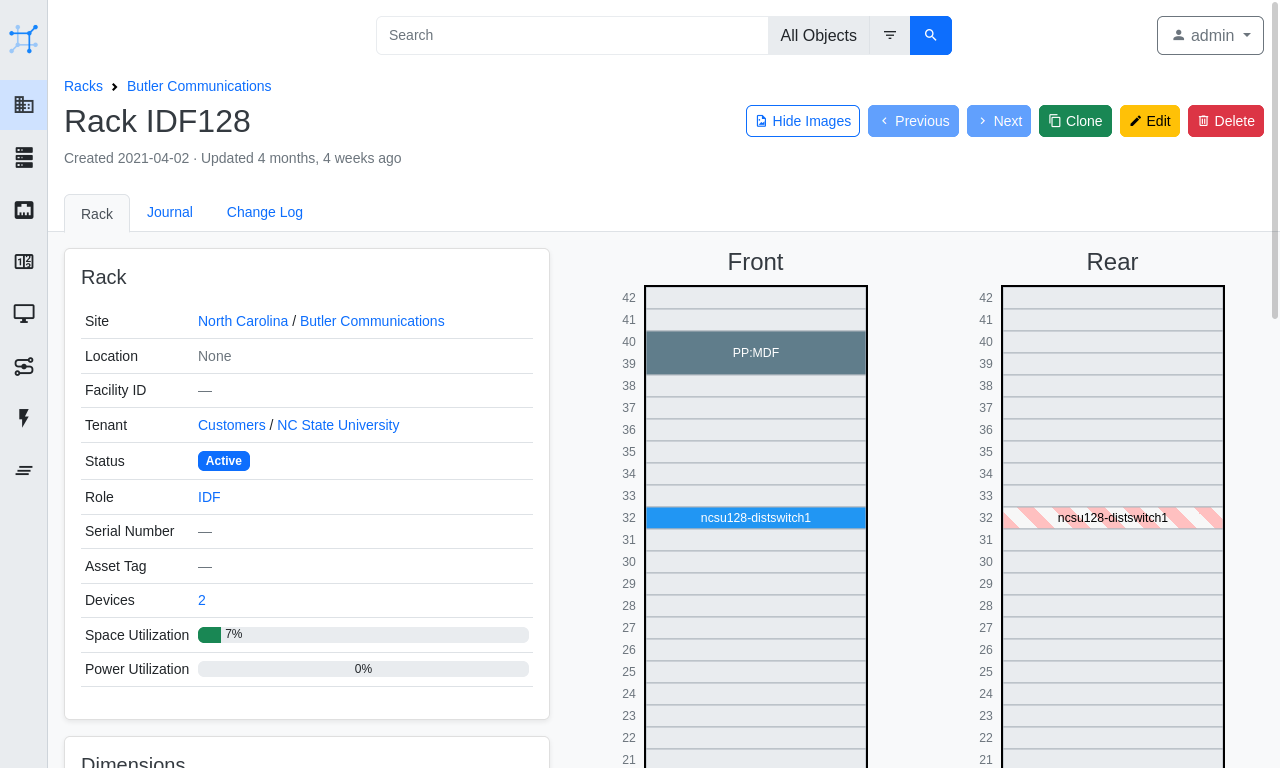
NetBox provides a great UI (shown below) allowing you to visualize your racks, a REST API and many other great features such as webhooks and export templating, to name but a few. In addition, NetBox encompasses the following aspects of network management:
- IP address management (IPAM) - IP networks and addresses, VRFs and VLANs
- equipment racks - organized by group and site
- devices - types of devices and where they are installed
- connections - network, console and power connections among devices
- virtualization - virtual machines and clusters
- data circuits - long-haul communications circuits and providers
NAPALM
NAPALM (Network Automation and Programmability Abstraction Layer with Multivendor support) is a Python library that implements a set of functions to interact with different network device operating systems using a unified API.
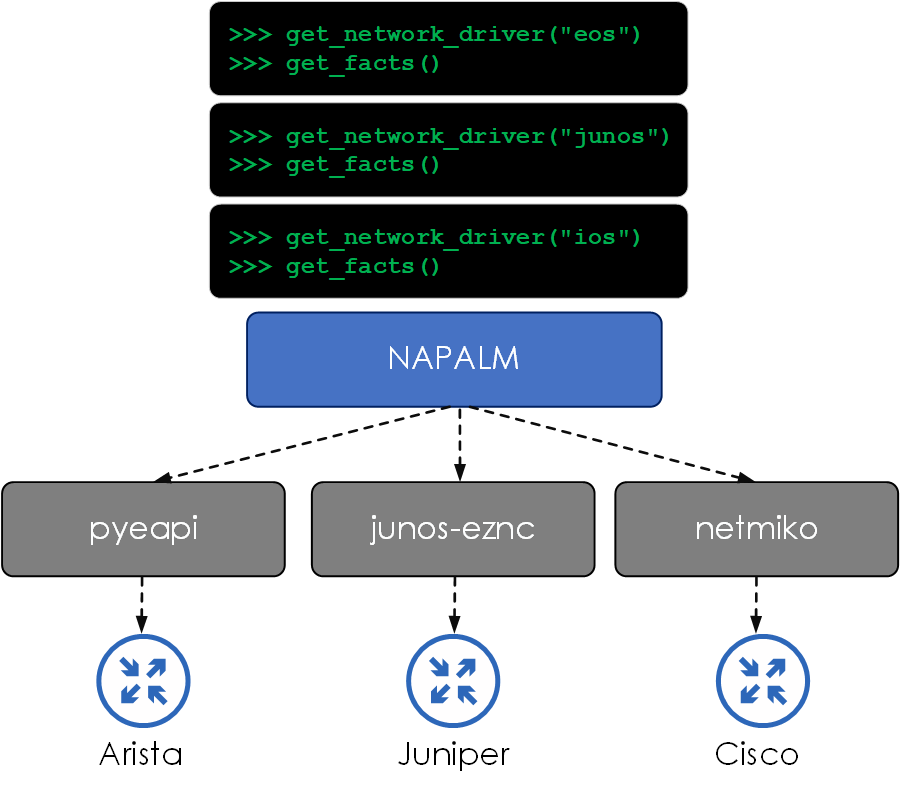
In other words, NAPALM abstracts the lower-level semantics of device interaction, such as which backend device library should be used (pyeapi, pynxos, netmiko etc) and which calls to make. NAPALM then presents a common set of methods that are agnostic of the platform type.
Let’s look at an example. Let’s say we want to collect the serial number of a Junos and an EOS-based device. This can be performed by initializing a NAPALM driver for the network OS type and performing the get_facts() method. As you can see below, the input method (get_facts) and the output response structure are the same for both devices, regardless of OS type.
from napalm import get_network_driver
from rich import print as rprint

# Connect to Junos device
junos_driver = get_network_driver("junos")
junos_device = junos_driver(hostname="172.29.151.5",
                            username="lab",
                            password="######")
junos_device.open()

# Connect to EOS device
eos_driver = get_network_driver("eos")
eos_device = eos_driver(hostname="172.29.151.7",
                        username="lab",
                        password="######")
eos_device.open()
# Print device facts
rprint(junos_device.get_facts())
===
{
    'vendor': 'Juniper',
    'model': 'VQFX-10000',
    'serial_number': '84665204160',
    'os_version': '18.1R3-S2.5',
    'hostname': 'leaf3-qfx',
    'fqdn': 'leaf3-qfx',
    'uptime': 3379388,
    'interface_list': [
        'gr-0/0/0',
        'pfe-0/0/0',
        'pfh-0/0/0',
        'xe-0/0/0',
...

rprint(eos_device.get_facts())
===
{
    'hostname': 'leaf5-eos',
    'fqdn': 'leaf5-eos',
    'vendor': 'Arista',
    'model': 'vEOS',
    'serial_number': '',
    'os_version': '4.23.8M-22478418.4238M',
    'uptime': 3379347,
    'interface_list': [
        'Ethernet1',
        'Ethernet2',
        'Ethernet3',
...
Nornir
Nornir (from the creator of NAPALM, David Barroso) is a pluggable multi-threaded framework with inventory management to help operate groups of devices. Nornir is 100% Python. Whereas many automation frameworks (such as Ansible) use their own Domain Specific Language (DSL), Nornir lets you control everything from Python. So why does being 100% Python matter? Well …
- Its easier to troubleshoot and debug by using existing Python logging and debugging tools.
- There is no DSL, which can get complex when advanced features are added.
At a high level, we have defined what Nornir is, but let’s dive into the actual details and the various components that make up the Nornir automation framework.
- Inventory - defines the devices (and any relating attributes) that our tasks will be performed against. The inventory structure consists of:
- Hosts -
hosts.yaml- individual hosts and any related attributes. - Groups -
groups.yaml- group definitions and any related attributes for the groups. Hosts are then added to these groups withinhosts.yaml. - Defaults -
defaults.yaml- contains attributes that can be assigned to all hosts regardless of group assignment.
- Hosts -
- Tasks - a Task is a Python function that is run on a per-host basis.
- Functions - functions run globally. For example,
print_resultis a function that prints the results of executed tasks.
If you are looking to learn more about Nornir, check out the Packet Coders’ on-demand video course below:
Rick Donato
Credit
Appreciation goes out to the creators of these open-source tools, their great work and continued efforts in the network automation community.
- David Barroso - Nornir/NAPALM
- Jeremy Stretch - NetBox.
Stack Overview
Now that we understand each of the components, let’s turn our attention to how the components will integrate (at a high level) with each other.
- NetBox will run as a Docker container.
- Nornir and its plugins will run within a Python virtual environment.
- Nornir will pull the inventory data from NetBox via the REST API.
- NAPALM will be consumed within Nornir via the
nornir_napalm.plugins.tasksplugin. - NAPALM will collect the config from the devices using the NAPALM
configgetter.
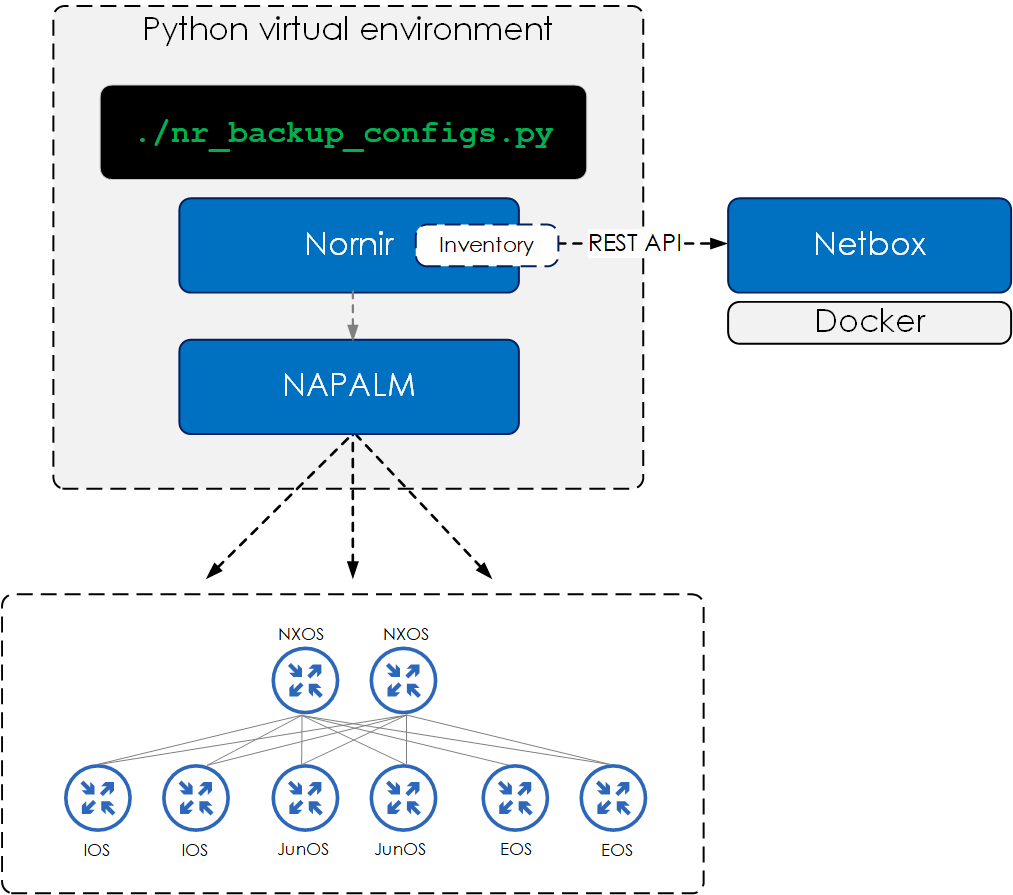
For this demo, we will be using a topology consisting of the following device and NOS’s:
- Juniper Junos
- Cisco NX-OS
- Cisco IOS
- Arista EOS.
Installation
NetBox
To install NetBox, run the following commands on your Docker host. If you haven’t got Docker installed, check out the install steps here.
$ git clone -b master https://github.com/netbox-community/netbox-docker.git
$ cd netbox-docker
Add the required port that you want Docker to expose NetBox on.
version: '3.4'
services:
  netbox:
    ports:
      - 8080:8080 \
Now bring up NetBox, like so:
$ docker-compose up -d
Once installed, you should see your running NetBox containers, like so:
$ docker-compose ps
               Name                              Command               State           Ports
-----------------------------------------------------------------------------------------------------
netbox-docker_netbox-housekeeping_1   /sbin/tini -- /opt/netbox/ ...   Up
netbox-docker_netbox-worker_1         /sbin/tini -- /opt/netbox/ ...   Up
netbox-docker_netbox_1                /sbin/tini -- /opt/netbox/ ...   Up      0.0.0.0:8080->8080/tcp
netbox-docker_postgres_1              docker-entrypoint.sh postgres    Up      5432/tcp
netbox-docker_redis-cache_1           docker-entrypoint.sh sh -c ...   Up      6379/tcp
netbox-docker_redis_1                 docker-entrypoint.sh sh -c ...   Up      6379/tcp
For full details around running NetBox on Docker, go to https://github.com/netbox-community/netbox-docker.
Nornir/NAPALM
Both Nornir and NAPALM can be installed using PIP, the Python package manager.
Therefore, what we will now do is:
- Clone the repo for this guide, which includes
requirements.txt, containing the required packages and versions for installing Nornir and NAPALM. - Create a virtual environment.
- Install the required packages defined within
requirements.txtinside our virtual environment. - Create an
.envfile which will hold the settings for the device credentials and also the NetBox API token.
For those of you new to virtual environments:
Virtual environments help to keep dependencies required by different projects separated by creating isolated Python virtual environments for them.
Great. Let’s go:
# clone repo
$ git clone https://github.com/packetcoders/nornir-napalm-netbox-guide
$ cd nornir-napalm-netbox-guide/

# create virtual environment and activate
$ python -m venv venv
$ source venv/bin/activate

# install packages within virtual environment
$ pip install -r requirements.txt

# create an .env file for our NetBox token and device credentials
$ cp .env.example .env
Once complete, you will have installed the required packages within your virtual environment and have the following files and folders within your current directory:
.
├── README.md
├── config.yaml
├── data
│   └── configs
|── .env
|── .env.example
│── requirements.txt
└── src
    ├── helpers.py
    ├── nr_backup_configs.py
    └── nr_print_inventory.py
To validate Nornir and NAPALM are installed, check the installed packages via pip freeze, like so:
$ pip freeze | grep -E "nornir|napalm"
napalm==3.3.1
nornir==3.1.1
nornir-napalm==0.1.2
nornir-netbox==0.3.0
nornir-utils==0.1.2
Configuration
Set Device Credentials
First we will set our device credentials within our .env, by populating the following:
$ cat .env
DEVICE_USERNAME=<username>
DEVICE_PASSWORD=<password>
...
Creating Devices in NetBox
Next you will need to create your devices within NetBox. The step-by-step instructions on how to do this are outside the scope of this guide, but at a high level you will need to:
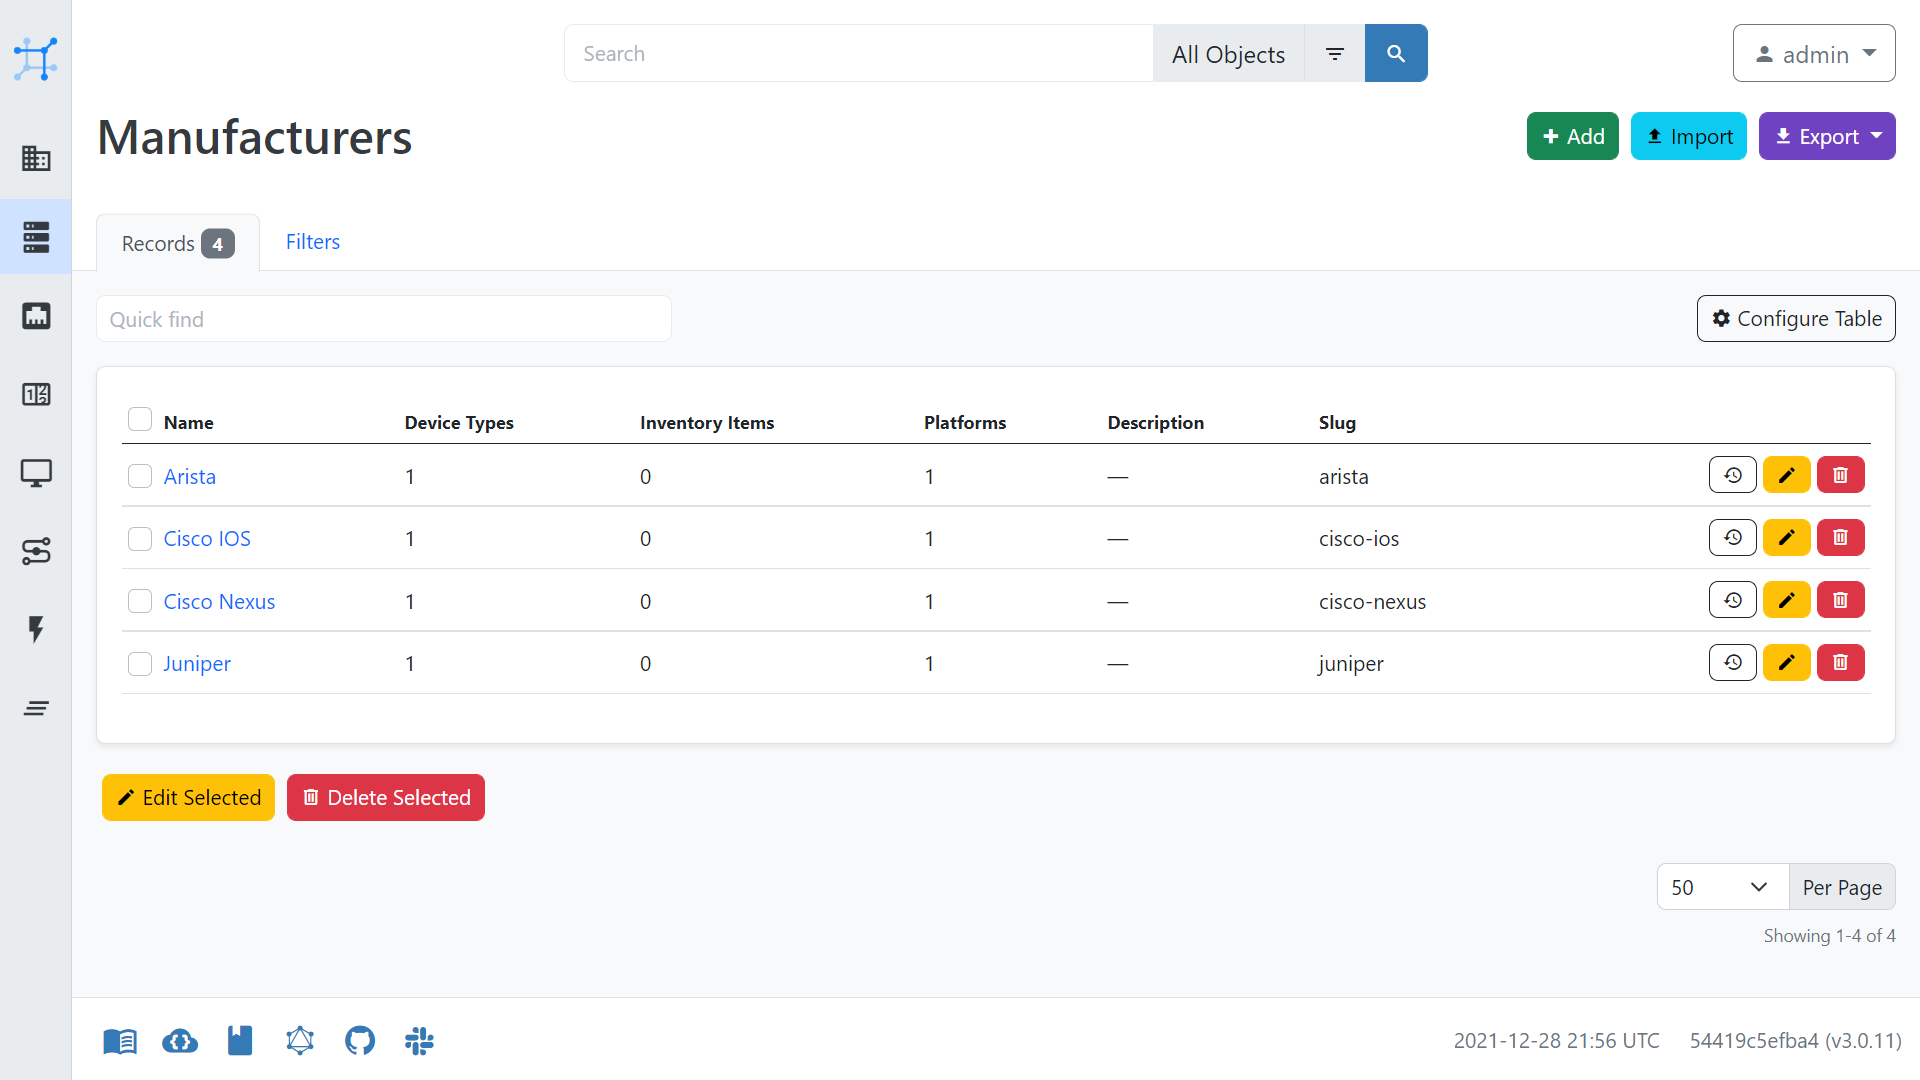
- create Manufacturers under Device Types
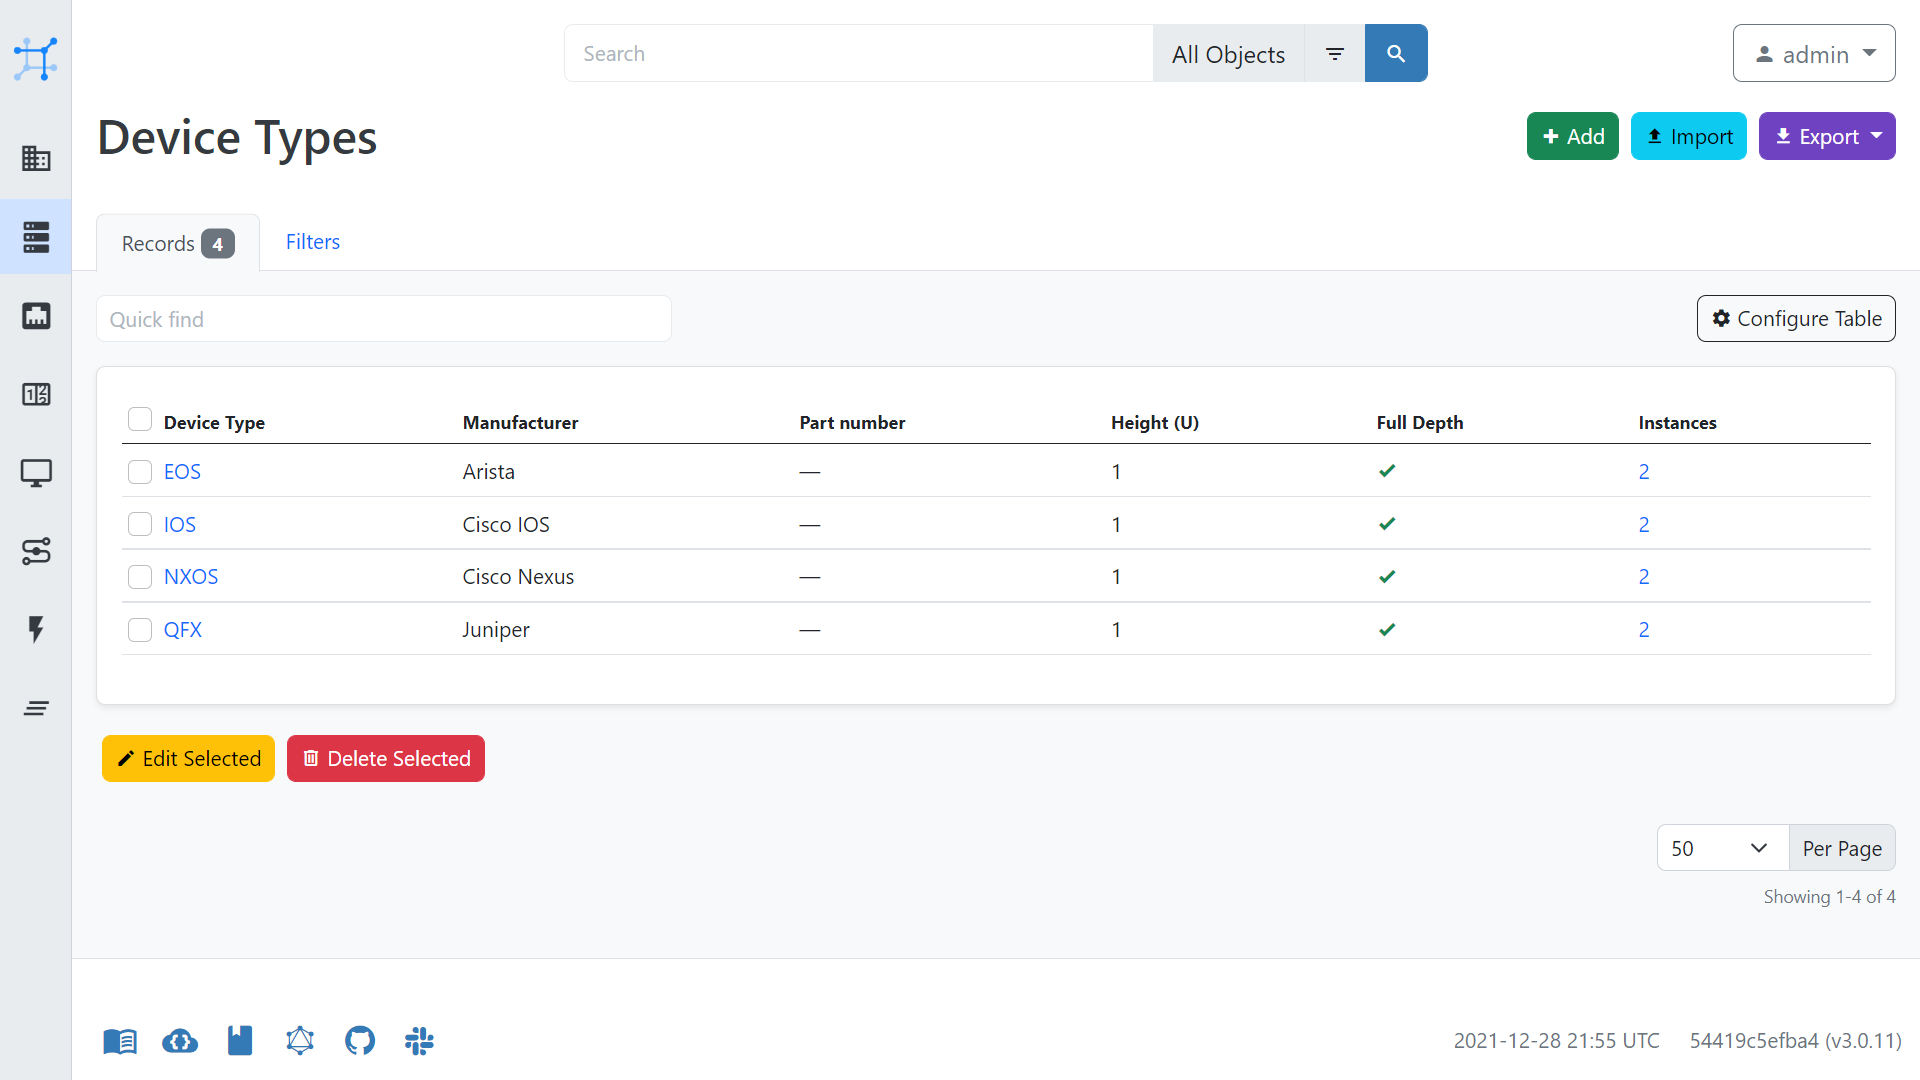
- create Device Types under Device Types
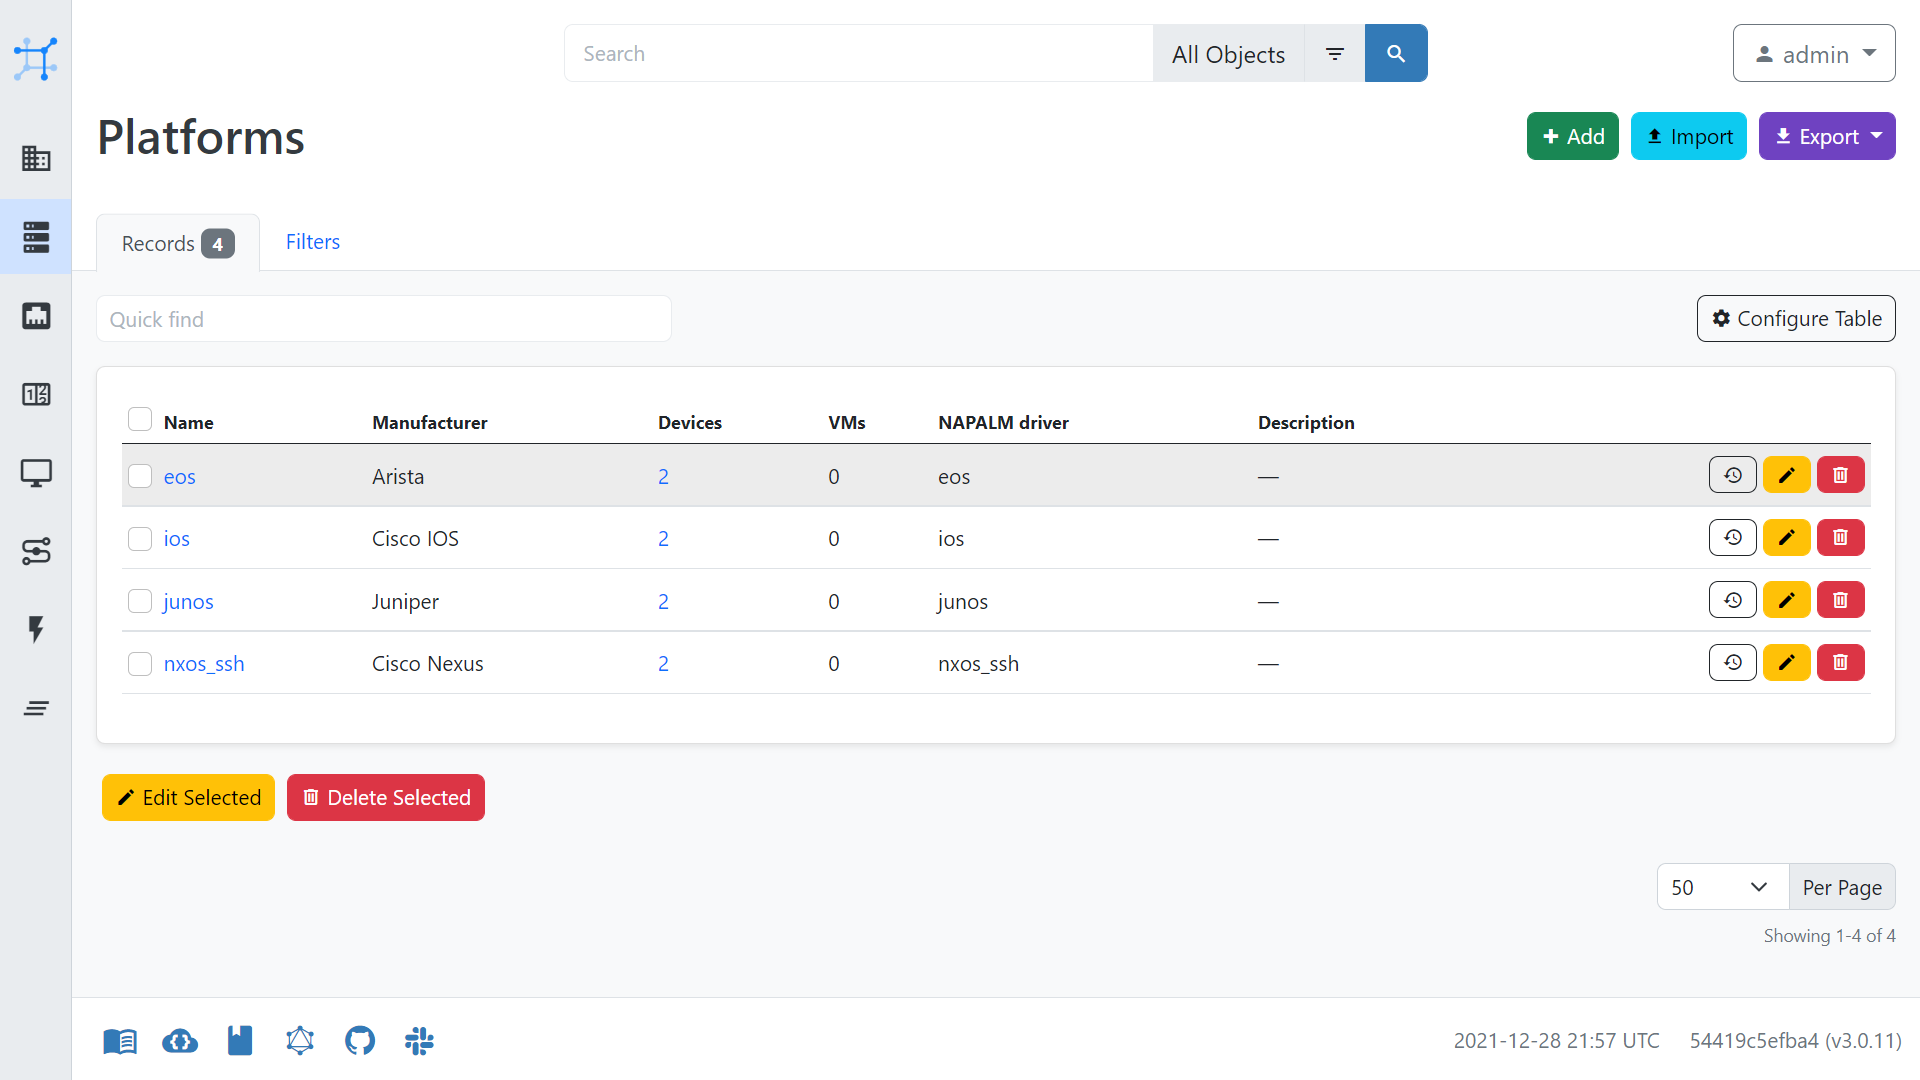
- create Platforms under Devices
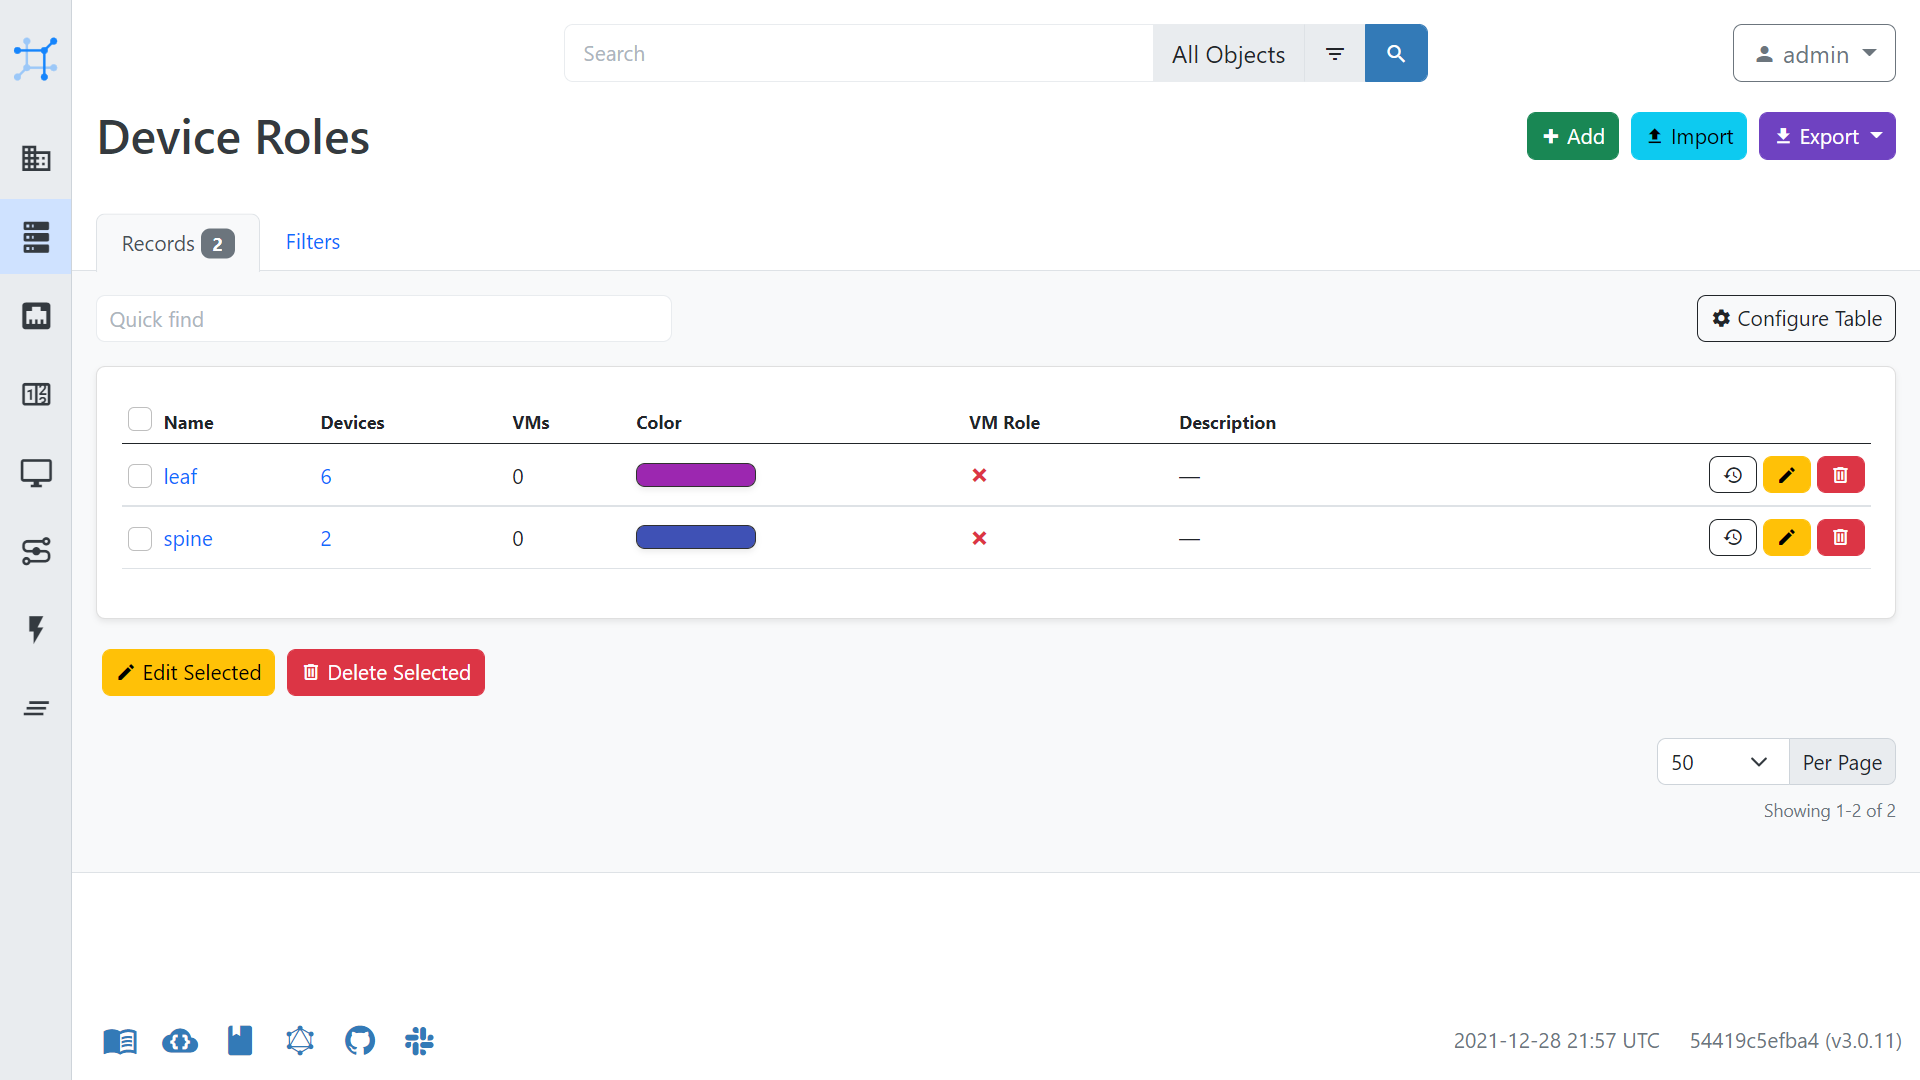
- create Device Roles under Devices
- create Devices under Devices
- within each device:
- add a management interface
- mark management interface as primary
- assign an IP.
Below are some of the settings for the creation of devices, which may aid you when configuring NetBox.

Nornir to NetBox Configuration
We will now turn our attention to integrating NetBox with Nornir via the NetBox plugin.
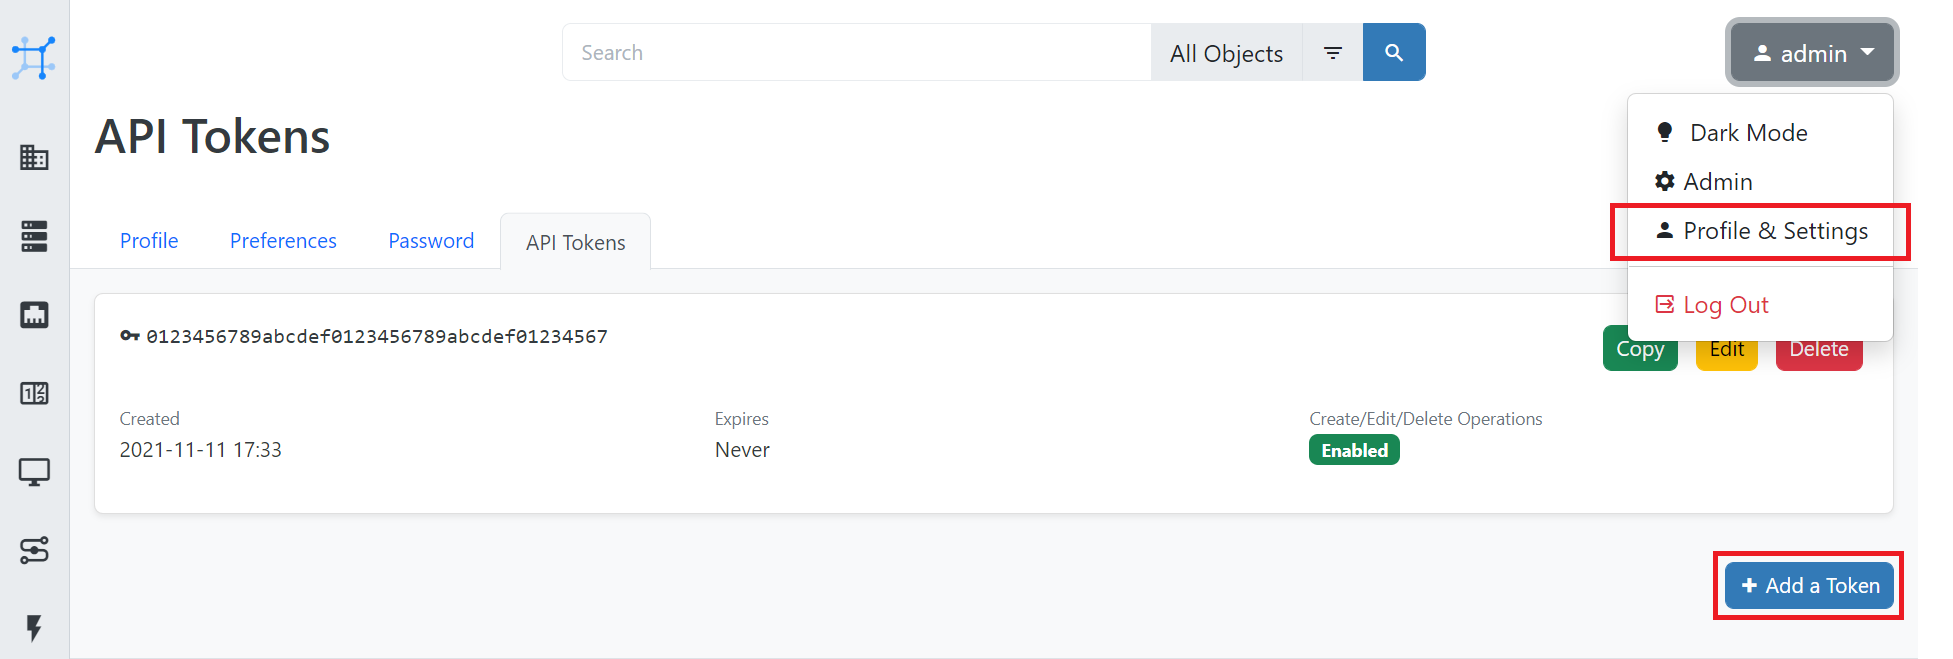
First of all, create an API token via the NetBox UI, like so:
Next, within .env, add the NetBox API token.
$ cat .env
...
NB_TOKEN=<token>
Now edit config.yml so that the NetBox URL is set to http://127.0.0.1:8080/, like so:
---
inventory:
  plugin: NetBoxInventory2
  options:
     nb_url: 'http://127.0.0.1:8080/'
     ssl_verify: False

logging:
  enabled: False
nb_url within the config.yml is set to http://netbox.lab.packetcoders.io:8080/. Thinking of becoming a member? Learn more by clicking here.
At this point, we can now test our Nornir to NetBox integration by running the task nr_print_inventory.py, which will output the contents of the NetBox inventory using Nornir.
$ ./src/nr_print_inventory.py
{
    'hosts': {
        'leaf1-ios': {
            'name': 'leaf1-ios',
            'connection_options': {},
            'groups': [
                'site__nebula',
                'platform__ios',
                'device_role__leaf',
                'manufacturer__cisco-ios',
                'device_type__ios'
            ],
            'data': {
                'id': 3,
                'url': 'http://netbox.lab.packetcoders.io:8080/api/dcim/devices/3/',
                'display': 'leaf1-ios',
                'name': 'leaf1-ios',
                'device_type': {
                    'id': 2,
                    'url': 'http://netbox.lab.packetcoders.io:8080/api/dcim/device-types/2/',
                    'display': 'IOS',
                    'manufacturer': {
                        'id': 1,
                        'url': 'http://netbox.lab.packetcoders.io:8080/api/dcim/manufacturers/1/',
                        'display': 'Cisco IOS',
                        'name': 'Cisco IOS',
                        'slug': 'cisco-ios'
                    },
                    'model': 'IOS',
                    'slug': 'ios'
                },
...
Example Use Case - Device Config Backups
One of the most common network automation use cases is to automate the backup of device configurations. Therefore, we are now going to build a Nornir script to pull the device configurations from our devices and then save these configurations locally.
Overview
Our Nornir script will be based upon the following:
src/helper.py- this will contain a Nornir setup function that will load the environment variables and Nornir config file.src/nr_backup_configs.py- this will contain a Nornir task that will run the NAPALM getter and then save the configs to a local directory.
Code Walk-Through
We will now walk through the two scripts that we will use to perform the device config backups based on the main code points and the corresponding comments.
src/helper.py
First of all, we have our helper script. The key point here is we are adding our Nornir initialization within the nornir_setup function. Adding this function here makes it central and it can be easily called within any other Nornir scripts we create, reducing the amount of boilerplate code we need to add across our scripts.
#!./venv/bin/python

# Perform imports
import os
from pathlib import Path

from dotenv import load_dotenv
from nornir import InitNornir

# Load and populate the environment variables from .env
load_dotenv()

# Set the path to the Nornir config file
NORNIR_CONFIG_FILE = f"{Path(__file__).parent.parent}/config.yaml"

# Create a Nornir setup function
def nornir_setup():
    # Initialize Nornir
    nr = InitNornir(config_file=NORNIR_CONFIG_FILE)

    # Set the username and password using the environment variables
    nr.inventory.defaults.username = os.getenv("DEVICE_USERNAME")
    nr.inventory.defaults.password = os.getenv("DEVICE_PASSWORD")

    return nr
src/nr_backup_configs.py
#!/usr/bin/env python

# Perform the required imports
from helpers import nornir_setup
from nornir_napalm.plugins.tasks import napalm_get
from nornir_utils.plugins.functions import print_result
from nornir_utils.plugins.tasks.files import write_file

# Perform the Nornir initialization
nr = nornir_setup()

# Set the path to where we want the backups to be saved
BACKUP_PATH = "./data/configs"

# Create a Nornir Task.
def backup_config(task, path):
    # Task 1. Run the NAPALM config getter to collect the config
    device_config = task.run(task=napalm_get, getters=["config"])

    # Task 2. Write the device config to a file using the Nornir, write_file task
    task.run(
        task=write_file,
        content=device_config.result["config"]["running"],
        filename=f"{path}/{task.host}.txt",
    )

# Run our back_config task against all of our devices. We provide the backup path and also the task name we want to run against all the devices.
result = nr.run(
    name="Backup Device configurations", path=BACKUP_PATH, task=backup_config
)

# Finally, we print the results of running our task against all the devices.
print_result(result, vars=["stdout"])
Running Our Backup Script
Let’s now run our backup script, like so:
$ ./src/nr_backup_configs.py
Backup Device configurations****************************************************
* leaf1-ios ** changed : False *************************************************
vvvv Backup Device configurations ** changed : False vvvvvvvvvvvvvvvvvvvvvvvvvvv INFO
---- napalm_get ** changed : False --------------------------------------------- INFO
---- write_file ** changed : False --------------------------------------------- INFO
^^^^ END Backup Device configurations ^^^^^^^^^^^^^^^^^^^^^^^^^^^^^^^^^^^^^^^^^^
* leaf2-ios ** changed : False *************************************************
vvvv Backup Device configurations ** changed : False vvvvvvvvvvvvvvvvvvvvvvvvvvv INFO
---- napalm_get ** changed : False --------------------------------------------- INFO
---- write_file ** changed : False --------------------------------------------- INFO
^^^^ END Backup Device configurations ^^^^^^^^^^^^^^^^^^^^^^^^^^^^^^^^^^^^^^^^^^
* leaf3-qfx ** changed : True **************************************************
vvvv Backup Device configurations ** changed : False vvvvvvvvvvvvvvvvvvvvvvvvvvv INFO
---- napalm_get ** changed : False --------------------------------------------- INFO
---- write_file ** changed : True ---------------------------------------------- INFO
^^^^ END Backup Device configurations ^^^^^^^^^^^^^^^^^^^^^^^^^^^^^^^^^^^^^^^^^^
* leaf4-qfx ** changed : True **************************************************
vvvv Backup Device configurations ** changed : False vvvvvvvvvvvvvvvvvvvvvvvvvvv INFO
---- napalm_get ** changed : False --------------------------------------------- INFO
---- write_file ** changed : True ---------------------------------------------- INFO
^^^^ END Backup Device configurations ^^^^^^^^^^^^^^^^^^^^^^^^^^^^^^^^^^^^^^^^^^
* leaf5-eos ** changed : False *************************************************
vvvv Backup Device configurations ** changed : False vvvvvvvvvvvvvvvvvvvvvvvvvvv INFO
---- napalm_get ** changed : False --------------------------------------------- INFO
---- write_file ** changed : False --------------------------------------------- INFO
^^^^ END Backup Device configurations ^^^^^^^^^^^^^^^^^^^^^^^^^^^^^^^^^^^^^^^^^^
* leaf6-eos ** changed : False *************************************************
vvvv Backup Device configurations ** changed : False vvvvvvvvvvvvvvvvvvvvvvvvvvv INFO
---- napalm_get ** changed : False --------------------------------------------- INFO
---- write_file ** changed : False --------------------------------------------- INFO
^^^^ END Backup Device configurations ^^^^^^^^^^^^^^^^^^^^^^^^^^^^^^^^^^^^^^^^^^
* spine1-nxos ** changed : False ***********************************************
vvvv Backup Device configurations ** changed : False vvvvvvvvvvvvvvvvvvvvvvvvvvv INFO
---- napalm_get ** changed : False --------------------------------------------- INFO
---- write_file ** changed : False --------------------------------------------- INFO
^^^^ END Backup Device configurations ^^^^^^^^^^^^^^^^^^^^
Great. If we now look within our folder, we will see all of our device configurations:
$ ls -l data/configs
-rw-r--r-- 1 rick rick 2805 Dec 29 10:55 leaf1-ios.txt
-rw-r--r-- 1 rick rick 2805 Dec 29 10:55 leaf2-ios.txt
-rw-r--r-- 1 rick rick 2547 Dec 29 10:55 leaf3-qfx.txt
-rw-r--r-- 1 rick rick 2547 Dec 29 10:55 leaf4-qfx.txt
-rw-r--r-- 1 rick rick 1218 Dec 29 10:55 leaf5-eos.txt
-rw-r--r-- 1 rick rick 1141 Dec 29 10:55 leaf6-eos.txt
-rw-r--r-- 1 rick rick 4209 Dec 29 10:55 spine1-nxos.txt
-rw-r--r-- 1 rick rick 4256 Dec 29 10:55 spine2-nxos.txt
Good stuff!
What Else?
In addition to what we are performing here, some other areas that I recommend you look into are:
- Scheduling the execution of your Nornir backup script. For example, have it run each night at a particular time, either via a cron job or another platform such as StackStorm or Rundeck.
- Commit your device configurations to version control (e.g. GitHub) so that you can perform comparisons between backups to see what has changed, which can significantly help with troubleshooting.
Outro
That concludes this guide around Nornir, NAPALM and NetBox. I can honestly say this guide has been a blast to create. As you can see, these tools give you enormous potential and flexibility in how you automate your network.