Now that we have reviewed the components and tools that we will use within our pipelines, let's turn our attention to each of the pipelines, the configuration, and also a walkthrough.
CI/CD Pipelines
We will configure 3 pipelines - Integration, Delivery and Deployment. Let’s recap on the role each pipeline will perform:
- Integration - Validate/Test the new network change that has been updated within our dev/feature branch.
- Delivery - Merge the changes from our dev/feature branch into master, and once again test and validate.
- Deployment - Deploy the new network change into production.
Below shows each of the steps, for each of the pipelines.
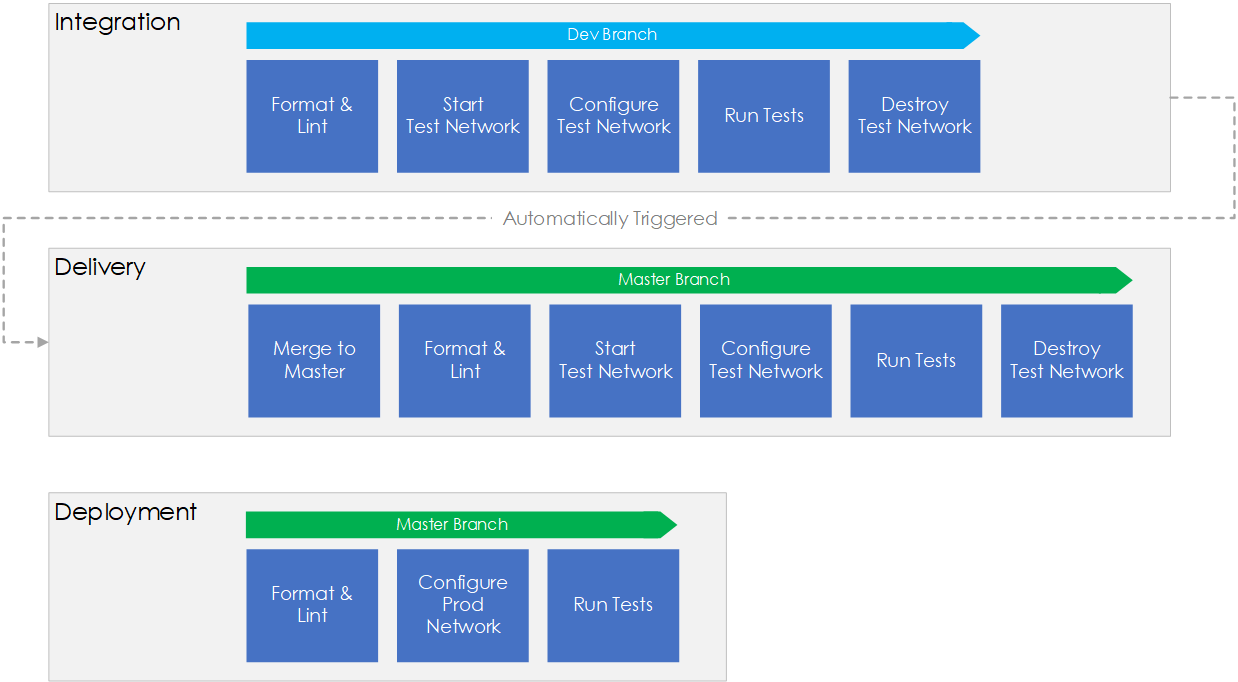
Figure 1 - CI/CD Pipeline Overview.
Let’s run through the steps:
Integration
- Jenkins will poll Github looking for any updates to non-master branches (aka feature/dev branches).
- Once triggered Jenkins will perform each of the steps shown above:
- Ansible YAMLs are formatted to remove end of line spaces.
- Linting is performed against Ansible YAML files.
- The test network is started within VIRL.
- Ansible configures the test network via the
testinventory file. - Tests are run to ensure our configuration is working as expected.
- The test network is stopped.
- Once successful the delivery pipeline will be automatically triggered.
Delivery
- The feature/dev branch is merged into master.
- The same steps are performed as per before:
- Ansible YAMLs are formatted to remove end of line spaces.
- Linting is performed against Ansible YAML files.
- The test network is started within VIRL.
- Ansible configures the test network via the
testinventory file. - Tests are run to ensure our configuration is working as expected.
- The test network is stopped.
- Once complete the master branch is ready to be deployed to live.
Note: In the real world you would expect to find more tests within the delivery phase , such as the inclusion of integration tests.
Deployment
- Pipeline is manually triggered.
- Steps are performed as shown above:
- Ansible YAMLs are formatted to remove end of line spaces.
- Linting is performed against Ansible YAML files.
- Ansible configures the production network via the
prodinventory file. - Tests are run to ensure our configuration is working as expected.
- Jenkins will create a tag/release within Github for this deployment.
We now have our new configuration validated, checked and deployed to production.
Configuration
Now let's turn our attention to the steps required to build the CI/CD pipelines.
Install Jenkins
Jenkins is installed using Docker. Like so,
$ docker pull jenkins/jenkins:lts
$ docker run -d --name jenkins --restart=always -p 8080:8080 -p 50000:50000 -v jenkins_home:/var/jenkins_home jenkins/jenkins:lts
$ docker exec -it -u root jenkins /bin/bash
# apt-get update -y
# apt-get install sudo make vim -y
Note: In addition you will need to grant the jenkins user sudo access.
Steps can be found within this post : https://sgoyal.net/2016/11/18/run-a-shell-from-jenkins-using-sudo-ubuntu/
You will now be able to connect to your Jenkins instance via http://<host_ip>:8080.
Configure Jenkin Plugins
Install the Slack Notification plugin via the Jenkins plugin manager. Full instructions can be found at https://github.com/jenkinsci/slack-plugin.
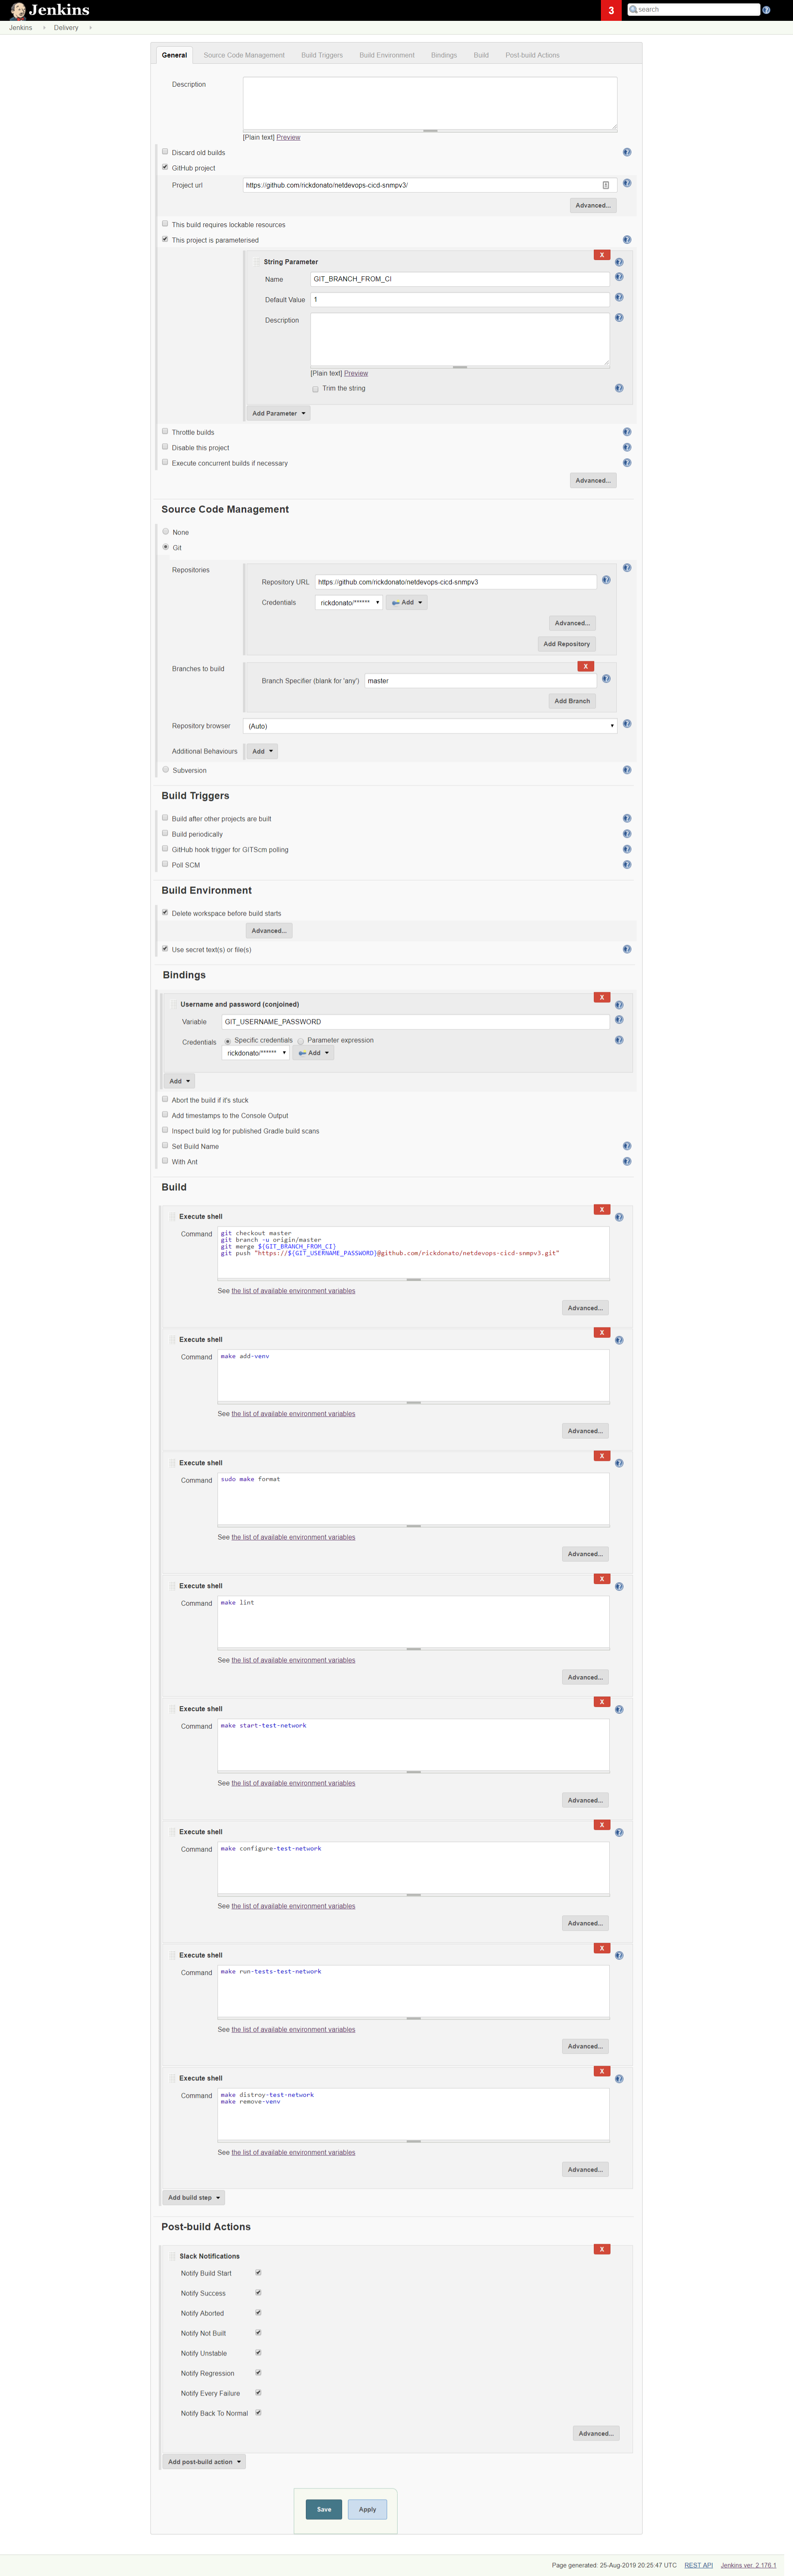
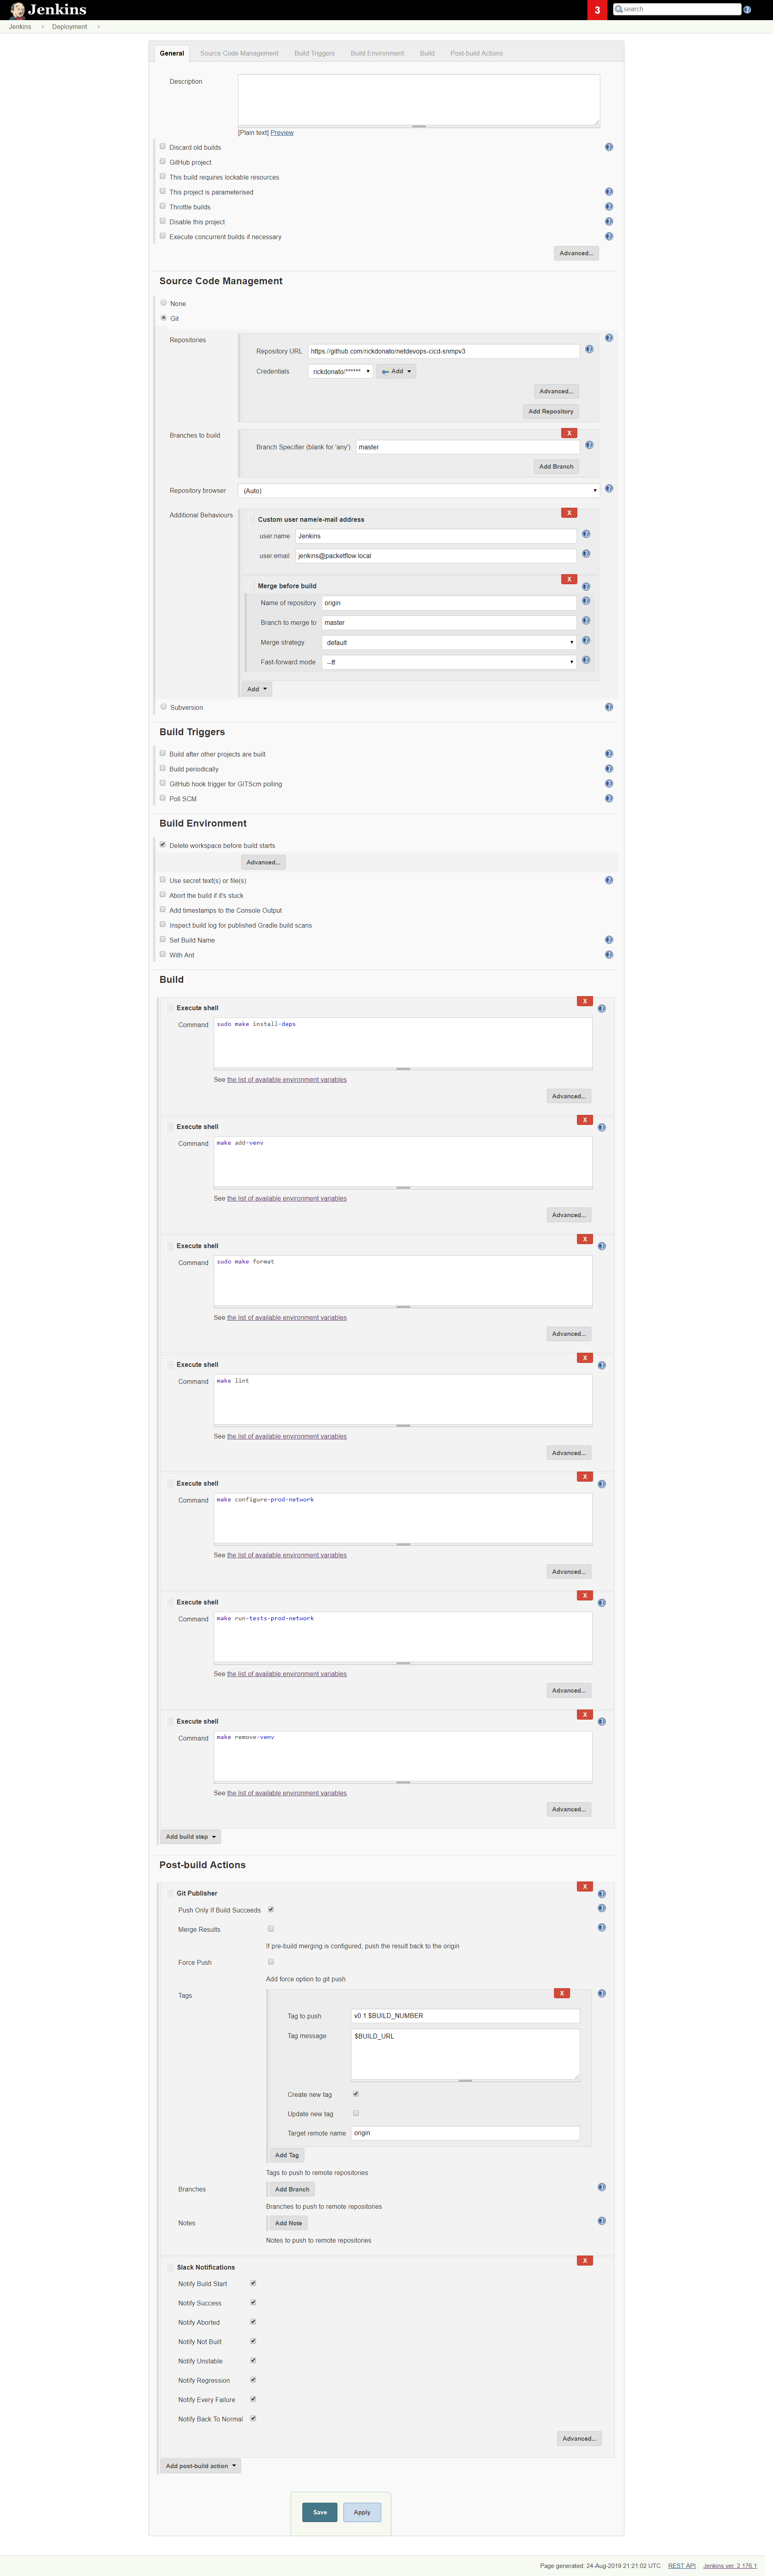
Configure Jenkin Projects
Each pipeline is configured via New Item > Freestyle Project.
Now there are quite a few configuration steps. Therefore, to make things easier I have included screenshots of each of the configured jobs in Jenkins (shown below):
| Integration | Delivery | Deployment |

|
|
|
Note: The github code repo for this tutorial also provides the project/job XML files. This allows you to import the Jenkins jobs rather than having to manually configure.
Walkthrough
Now that we have built the Jenkins pipelines let's perform a walkthrough of how the overall workflow would look using the configured CI/CD pipelines.
Development
First, there is the development stage. Here we will develop our network change locally. Typically this stage will involve taking the code base, and creating a new branch. Once done, the change would be made to a small dev network, for example a single device (created via Docker or Vagrant), and some simple tests run.
Note: This stage sits outside of our CI/CD pipelines.
Clone Repo
root@desktop:~# git clone https://github.com/rickdonato/netdevops-cicd-snmpv3.git
Cloning into 'netdevops-cicd-snmpv3'...
remote: Enumerating objects: 45, done.
remote: Counting objects: 100% (45/45), done.
remote: Compressing objects: 100% (24/24), done.
remote: Total 571 (delta 28), reused 34 (delta 21), pack-reused 526
Receiving objects: 100% (571/571), 78.23 KiB | 0 bytes/s, done.
Resolving deltas: 100% (263/263), done.
Checking connectivity... done.
Create Branch
root@desktop:~# cd netdevops-cicd-snmpv3/
root@desktop:~/netdevops-cicd-snmpv3# git checkout -b add-snmp-user
Switched to a new branch 'add-snmp-user'
Make Change
root@desktop:~/netdevops-cicd-snmpv3# vim ansible/playbooks/group_vars/all.yaml
Deploy/Validate
At this point the change would be made to the dev network and some tests run. For the scope of this article we will presume that this all passed.
Push to Github
root@desktop:~/netdevops-cicd-snmpv3# git add -A
root@desktop:~/netdevops-cicd-snmpv3# git commit -m "add snmp user3"
[add-snmp-user 5a8f95d] add snmp user3
 1 file changed, 5 insertions(+)

root@desktop:~/netdevops-cicd-snmpv3# git push -u origin add-snmp-user
Username for 'https://github.com': rickdonato
Password for 'https://[email protected]':
Counting objects: 6, done.
Delta compression using up to 8 threads.
Compressing objects: 100% (5/5), done.
Writing objects: 100% (6/6), 532 bytes | 0 bytes/s, done.
Total 6 (delta 3), reused 0 (delta 0)
remote: Resolving deltas: 100% (3/3), completed with 3 local objects.
remote:
remote: Create a pull request for 'add-snmp-user' on GitHub by visiting:
remote:      https://github.com/rickdonato/netdevops-cicd-snmpv3/pull/new/add-snmp-user
remote:
To https://github.com/rickdonato/netdevops-cicd-snmpv3.git
 * [new branch]      add-snmp-user -> add-snmp-user
Branch add-snmp-user set up to track remote branch add-snmp-user from origin.
Integration
At this point, Jenkins will see the change and execute the Integration Job.
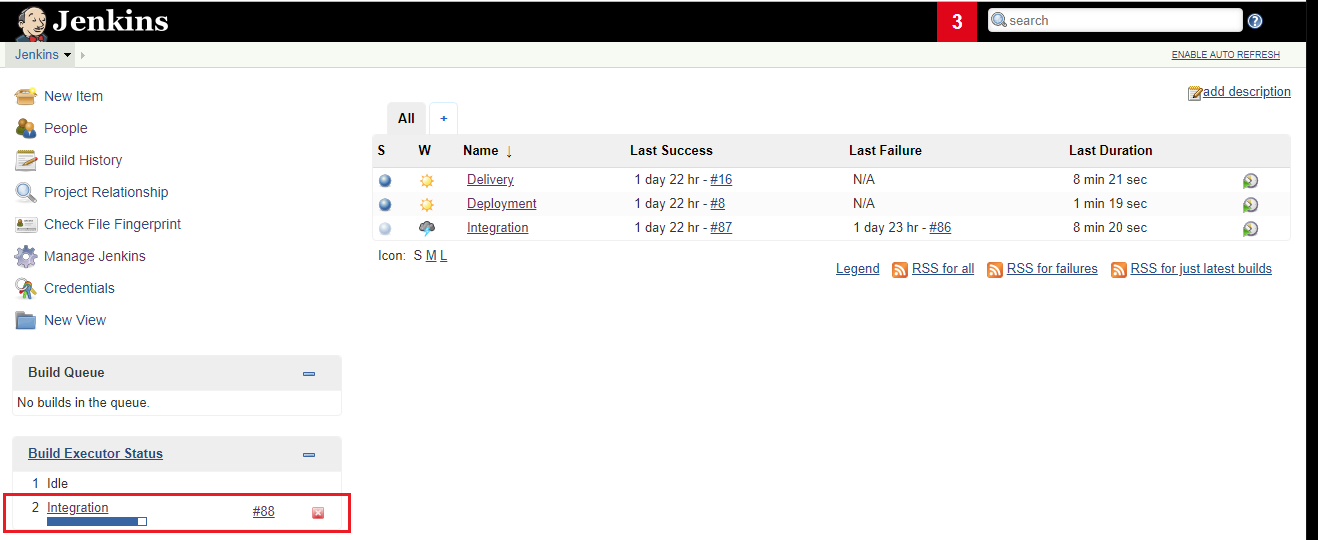
Figure 2 - Jenkins projects and Integration execution.
The progress can be viewed via the builds console output (shown below).
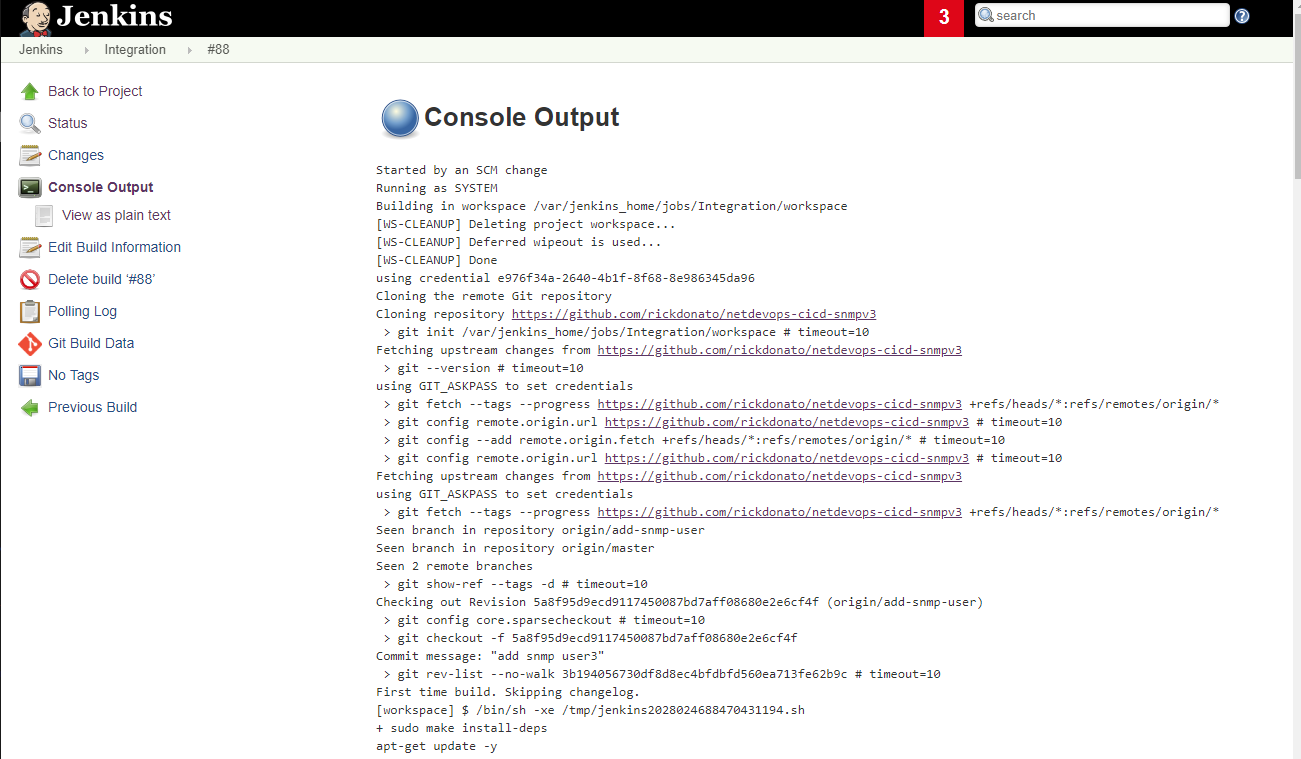
Figure 3 - Build console log.
During the progress of this build (aka the Integration pipeline), over on VIRL we can see that the test network has been deployed.
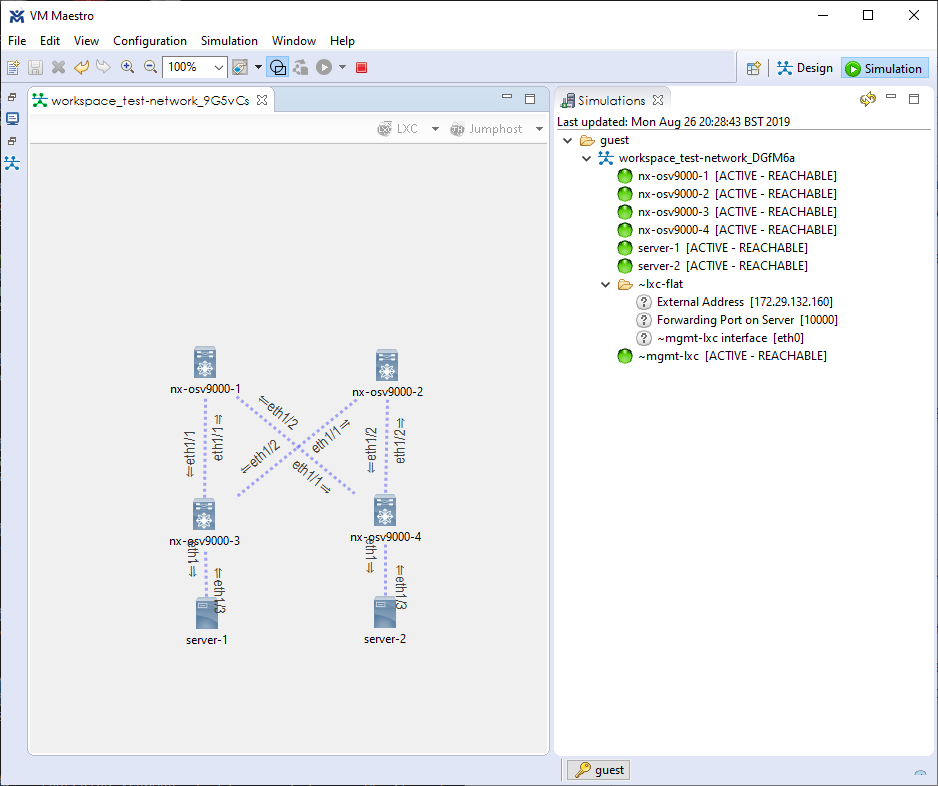
Figure 4 - Test network in VIRL.
Delivery
Once the Integration pipeline is complete Delivery is performed. Once complete we see the Slack notification, shown below, notifying us that our network configuration is ready to be deployed to production.
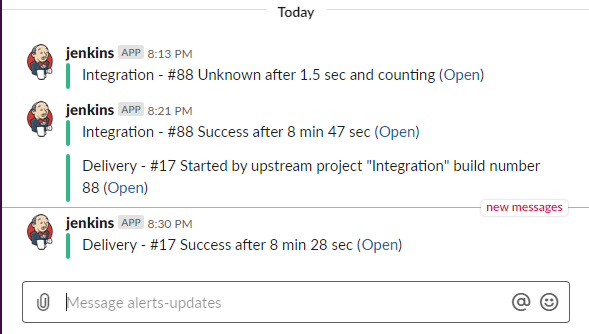
Figure 5 - Slack Notification
Deployment
We can now start the Deployment pipeline by selecting Build Now from within the Jenkin Deployment job. Like so,
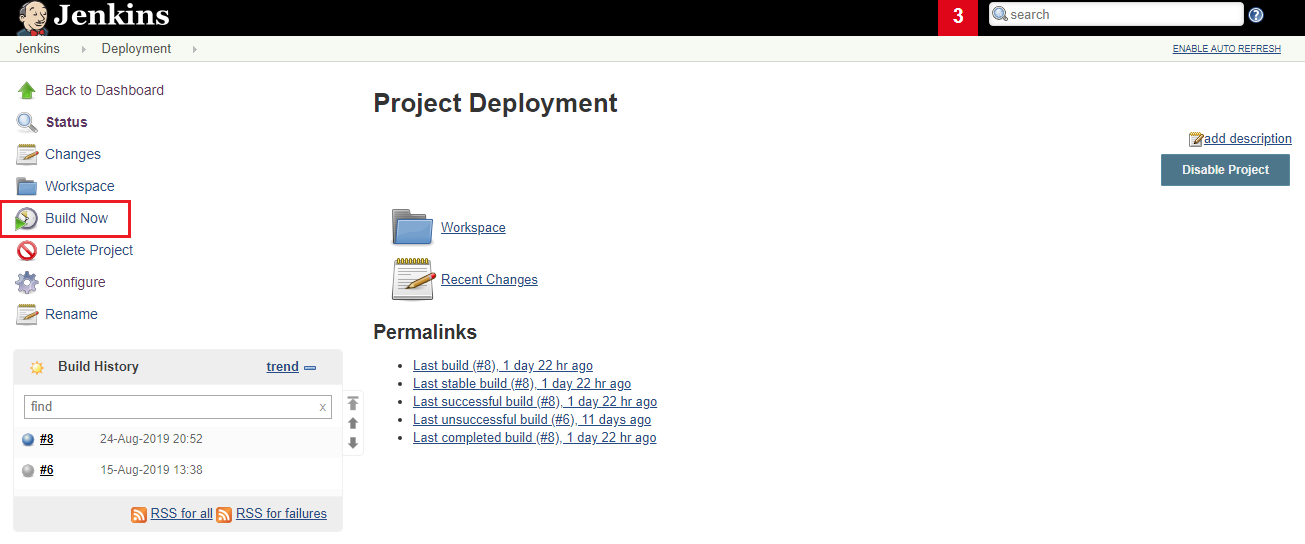
Figure 6 - Manual Triggering of Deployment
Note: For our example we also use VIRL to run a fake prod environment.
Once deployment is complete, we again see a success notification via Slack , and also the new release within Github, as shown below:
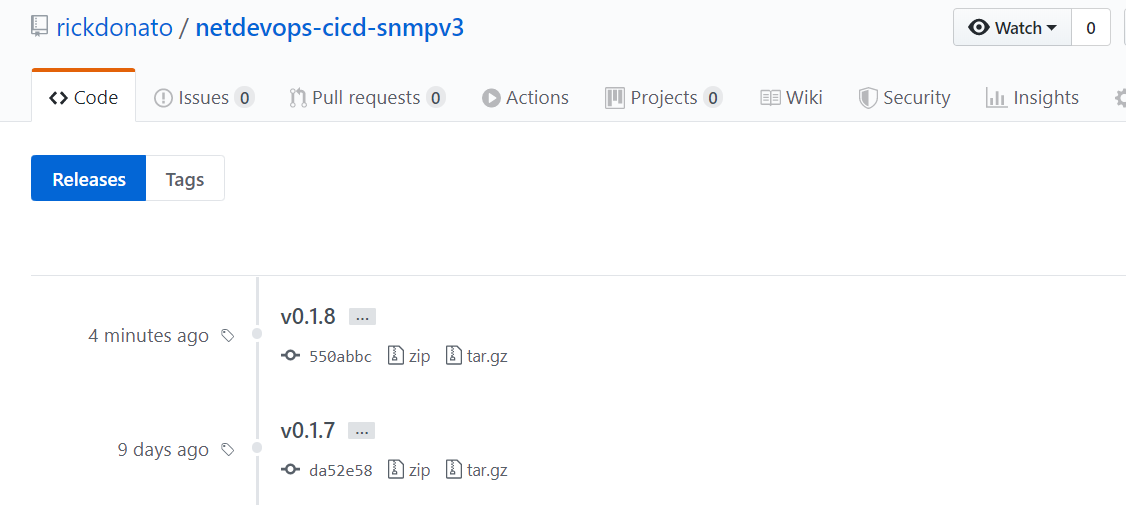
Figure 7 - Git Release
Outro
That concludes this tutorial on NetDevOps CI/CD with Ansible, Github, Jenkins and Cisco VIRL. I hope you have both enjoyed and found it useful.
If you have any comments or feedback I would love to hear from you. Also if you need help with any of the points described within this series feel free to contact me via the comments below.
The code for this tutorial can be located at https://github.com/rickdonato/netdevops-cicd-snmpv3